Difference between revisions of "Translating with Trados Studio"
Jump to navigation
Jump to search
Globalwiki (talk | contribs) |
Globalwiki (talk | contribs) |
||
| (13 intermediate revisions by the same user not shown) | |||
| Line 8: | Line 8: | ||
# [[#Downloading the Files|Download the files]] | # [[#Downloading the Files|Download the files]] | ||
# [[#Translating the Files|Translate the files]] | # [[#Translating the Files|Translate the files]] | ||
| + | #* [[#To translate the files using XLF:|Translate XLIFF 1.2 files]] | ||
| + | #* [[#Studio 2015 - Settings for high fuzzy matches|Studio settings - fuzzy matches]] | ||
| + | #* [[#To translate the files using RTF:|Translate Bilingual RTF]] | ||
# [[#Uploading the Files|Upload the files]] | # [[#Uploading the Files|Upload the files]] | ||
| Line 35: | Line 38: | ||
You can then translate the files in Trados Studio. | You can then translate the files in Trados Studio. | ||
| − | + | ====To translate the files using XLF:==== | |
# Download the project files as XLIFF 1.2 from GlobalSight | # Download the project files as XLIFF 1.2 from GlobalSight | ||
# Open Studio and create a New Project | # Open Studio and create a New Project | ||
| Line 42: | Line 45: | ||
#* Create a project TM or load an existing TM for the client | #* Create a project TM or load an existing TM for the client | ||
#* Import the TMX file(s) into the TM | #* Import the TMX file(s) into the TM | ||
| − | #* Set PerfectMatch to 'Use the original translation origin and status' | + | #* Set PerfectMatch to '''Use the original translation origin and status''' |
| − | [[File:studio_new_proj_match_perfect.png|thumb|left| | + | #* [[File:studio_new_proj_match_perfect.png|thumb|left|500px]] <br style="clear: both" /> |
| − | #* On Home tab open Project Settings->File Types->XLIFF->Settings, Enable option Do not store segmentation information in the translated file | + | #* On Home tab open Project Settings->File Types->XLIFF->Settings, Enable option '''Do not store segmentation information in the translated file'''. Otherwise Studio can silently modify the source tags breaking uploads (see [[Troubleshooting_translation_problems#Upload_Error:_The_following_tags_cannot_be_added:_.5Bxnull.5D|here]]) |
| − | # Translate the file(s) and Export (Batch Tasks->Export files->File version to export: Target version->Finish) | + | #* [[File:Studio 2014 Xliff setting.png|left|left|889px|thumb]]<br style="clear: both" /> |
| + | # Translate the file(s) and Export (Batch Tasks->Export files->File version to export: Target version->Finish)<br style="clear: both" /> | ||
| − | '''To translate the files using RTF: | + | |
| + | ====Studio 2015 - Settings for high fuzzy matches==== | ||
| + | |||
| + | In instances where high fuzzy matches are not appearing in Trados Studio, follow these steps. | ||
| + | #* Open '''Project Settings''' and select '''Translation Memory and Automated Translation''' area. | ||
| + | #* Select '''Search''' and for both '''Translation''' and '''Concordance''', reduce '''Minimum match value''' to 60. | ||
| + | |||
| + | Confirm whether you get the fuzzy match in Studio when using Concordance feature or moving to the segment. | ||
| + | |||
| + | [[File:2015_fuzzy_01.png|left|left|859px|thumb]]<br style="clear: both" /> | ||
| + | |||
| + | |||
| + | ====To translate the files using RTF:==== | ||
# Download the project files as bilingual RTF from GlobalSight | # Download the project files as bilingual RTF from GlobalSight | ||
# Convert the RTF files to bilingual DOCX | # Convert the RTF files to bilingual DOCX | ||
Latest revision as of 13:45, 31 January 2017
| Translation Wiki | |||||||||
| Jump to: Home | Main User Guide | |||||||||
 | |||||||||
| General About GlobalSight My Activities | My Account | |||||||||
| |||||||||
| |||||||||
| Making DTP/LSO Review Changes | |||||||||
| Support Support | FAQs | Training System Requirements Logging in |
| Related Information: |
To translate a file using SDL Trados Studio:
Downloading the Files
Download the files for translation by downloading the translation kit.
Set the preferred Format that corresponds to your version of SDL Trados when downloading the translation kit.
The recommended download options are:
| Version | Download Options |
|---|---|
| SDL Trados Stuido 2009+ | XLIFF, RTF (List view), TTX |
Unzip the files from the translation kit to your computer.
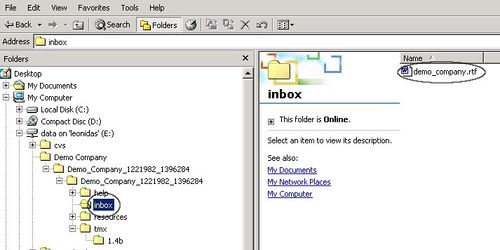
The chosen file format for translation (RTF, XLF or TTX) is stored in the inbox folder.
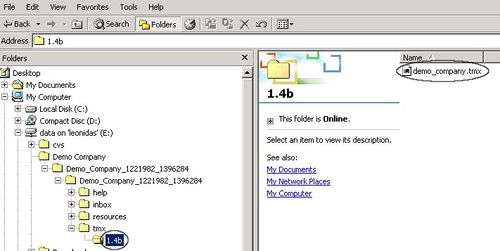
The TMX file(s) are stored in the tmx folder.
Translating the Files
You can then translate the files in Trados Studio.
To translate the files using XLF:
- Download the project files as XLIFF 1.2 from GlobalSight
- Open Studio and create a New Project
- Do not enable 'Allow source editing' option
- Add the XLF file to the Project Files
- Create a project TM or load an existing TM for the client
- Import the TMX file(s) into the TM
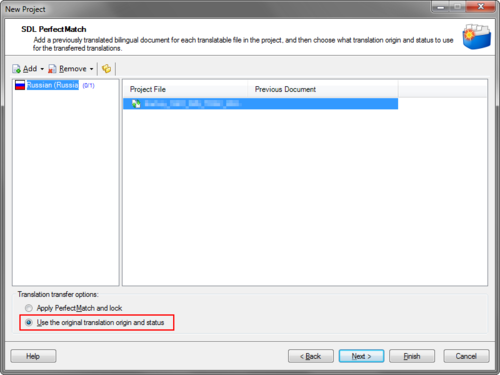
- Set PerfectMatch to Use the original translation origin and status
-
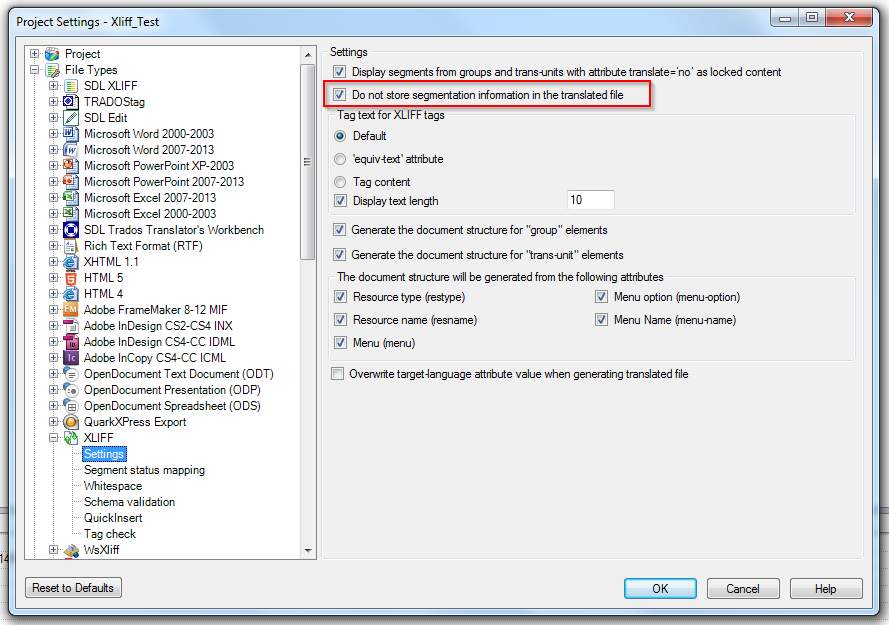
- On Home tab open Project Settings->File Types->XLIFF->Settings, Enable option Do not store segmentation information in the translated file. Otherwise Studio can silently modify the source tags breaking uploads (see here)
- Translate the file(s) and Export (Batch Tasks->Export files->File version to export: Target version->Finish)
Studio 2015 - Settings for high fuzzy matches
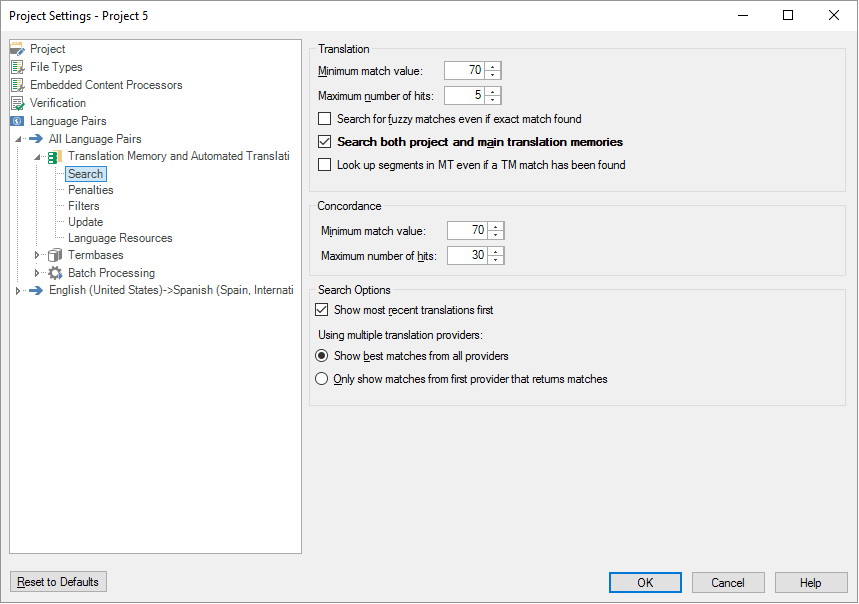
In instances where high fuzzy matches are not appearing in Trados Studio, follow these steps.
- Open Project Settings and select Translation Memory and Automated Translation area.
- Select Search and for both Translation and Concordance, reduce Minimum match value to 60.
Confirm whether you get the fuzzy match in Studio when using Concordance feature or moving to the segment.
To translate the files using RTF:
- Download the project files as bilingual RTF from GlobalSight
- Convert the RTF files to bilingual DOCX
- Open Studio and make sure that the Tools->Options->File Types->Word 2007-2010->Common->Process files with tw4winMark style checkbox is not checked
- Create and process a project with the bilingual DOCX file(s)
- Export the translated files back to DOCX
- Convert the translated DOCX files back to RTF
Uploading the Files
To upload the translation:
- Open GlobalSight and upload the files
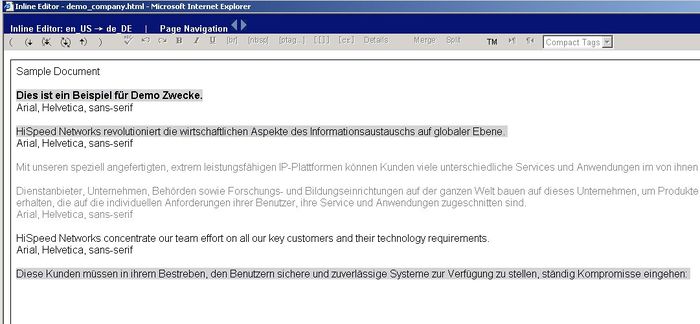
- Open the file with the Inline Editor and verify that the translation has been uploaded
You can see the uploaded translation. - Click Task Completed to finish the translation and send the job on to the reviewer

