Creating File Profiles
The file profile is configured with all of the information needed for users to create jobs.
Each file profile is a specific combination of:
- File formats
- File encodings
- Workflows
- TM settings
The file profile is very similar to the localization profile. The main difference is that it also includes the source file format and the encoding.
Contents
Naming File Profiles
Users must be able to tell the configuration from the name of the file profile. For example, you can name a file profile something as simple as “Marketing”, or as complicated as “HTML_UTF8_en-US_T”.
Use a simple name if you have only a few file profiles.
Use a longer and more informative name if you have many file profiles.
The target locales available are retrieved when the user selects the file profile.
Check that the file profile is associated with all of the target locales necessary.
To get the correct target locale(s) in a file profile, you must pick:
- The correct Localization Profile, that has
- The correct workflows that are tied to
- The correct target locales
File Profiles and Localization Profiles
The File Profile is essentially a localization profile that is applied to a specific Source File Format and Source File Encoding. Most of the main localization configurations are actually set in the localization profile.
As mentioned above, target locales are tied to workflows, and workflows are embedded in a localization profile.
GlobalSight has a good reason for attaching a target locale to a workflow, and then associating it three levels below the file profile. The reason is flexibility.
Once you create a workflow with all the right activities, assignees, and language pairs, you can then re-use it in different localization profiles. The workflow essentially becomes a plug-and-play object that encapsulates all the details of a localization process.
For that reason, the administrator uses an informative name for the workflow. For example, “en_US_de_DE_TR” means a Translate and Review process that translates an English (United States) file to a German (Germany) file.
Remember that each workflow only applies to one specific target encoding. You may then want to name the workflow “en_US_de_DE_TR_UTF8”, if there are workflows that have the same translation process and differ only in target encodings.
Creating File Profiles
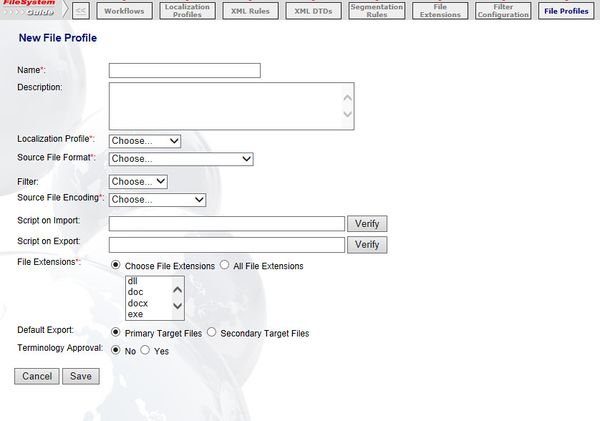
To create a file profile:
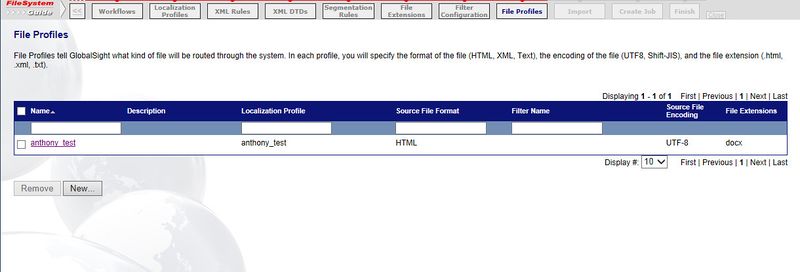
- Click File Profiles in the FileSystem Guide
- Click New. The New Profile page opens
- Enter an easy-to-understand Name
- Enter a Description
- Select the Localization Profile
- Select the Source File Format
- Select the Filter
- Select the Source File Encoding
- Enter the path of any pre-processing script that you would like to run on import in Script on Import
- Enter the path of any post-processing script that you would like to run on export in Script on Export
- Select the File Extensions
- Click Save
Creating Unextracted File Profiles
You can enable clients to upload any kind of file by setting up an unextracted file profile.
The GlobalSight team then processes the file through the appropriate filter.
First, you need to create file extensions to add to the unextracted file profile. For example PDF.
You can create a new file extension by clicking Data Sources->File Extensions and adding the new format.
Then create the New File profile, selecting “Unextracted” as the Source File Format and the required extension from Files Extensions.
You can also select All File extensions to process all files with an Unextracted File Profile.


