Importing Terminology
Jump to navigation
Jump to search
You can import terminology (or glossaries) for use in your project.
Importing terminology involves:
- Defining the termbase
- Importing the terminology file
Defining the Termbase
To define the termbase:
- Click Terminology in the FileSystem Guide
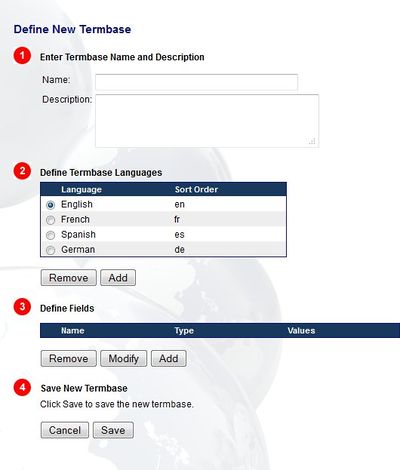
- Click New. The Define New Termbase page opens
- Enter a Name and a Description
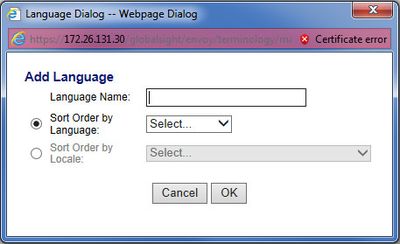
- Click Add to include other termbase languages
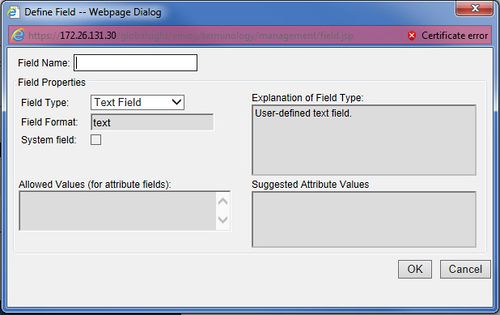
- Click Add/Modify to define the fields needed
- Click Save
Importing Terminology
You can then import the termbase in any of the formats supported.
To import a glossary (terminology):
- Select the new termbase
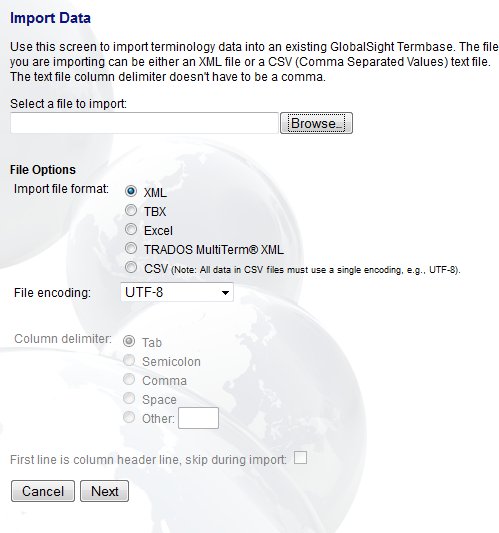
- Click Import. The Import Data page opens
- Click Browse and select the glossary file
- Select the format of the glossary file that you are importing:
- XML: import the file as a .xml file. The XML must follow a specific termbase XML DTD
- TBX: import the file in LISA TMX format, a terminology interchange format
- Excel: import the file in MS Excel format
- TRADOS MultiTerm® XML: import the file in SDL Trados MultiTerm® XML format, a terminology management tool. Note that images are not supported
- CSV: import the file in Comma Separated Value format. All data in CSV files must use a single encoding, for example UTF-8
- Select the file encoding
- Select the column delimiter used in the text file, for CSV files only. If the first line of the delimited text file is a header, check the box
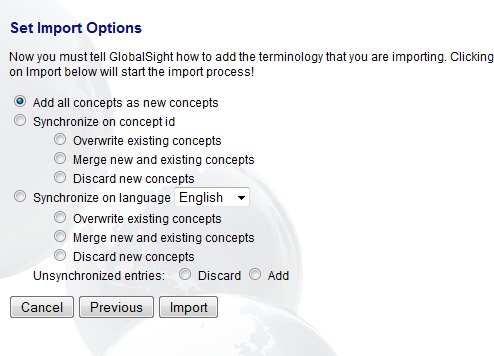
- Click Next. The Set Import Options page opens
- Select the best option for adding concepts. Concepts are wider subjects areas that contain a number of terms
- Add all concepts as new concepts: all concepts in the file are added to the termbase
- Synchronize on concept id: you can use the concept ID to define how concepts are added:
- Overwrite existing concepts: existing concepts are overwritten by new concepts if two concepts have the same ID. Any extra language term data remains
- Merge new and existing concepts: new concepts are merged with existing concepts if two concepts have the same ID
- Discard new concepts: new concepts are discarded if two concepts have the same ID
- Synchronize on language you can use the language to define how concepts are added:
- Overwrite existing concepts: existing concepts are overwritten by new concepts if two concepts contain the same term in the selected language. Any extra language term data remains
- Merge new and existing concepts: new concepts are merged with existing concepts if two concepts contain the same term in the selected language
- Discard new concepts: new concepts are discarded if two concepts contain the same term in the selected language
- Unsynchronized entries: decide how to handle concepts that are not in the existing termbase when synchronizing by concept ID or language:
- Discard: new concepts are discarded
- Add: new concepts are added to the termbase
- Click Import
- Click Browse once the data has been imported
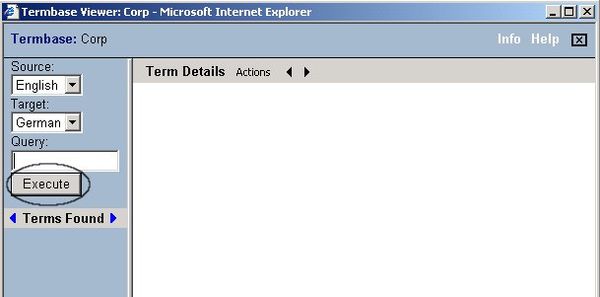
- Click Execute when the Termbase Viewer appears
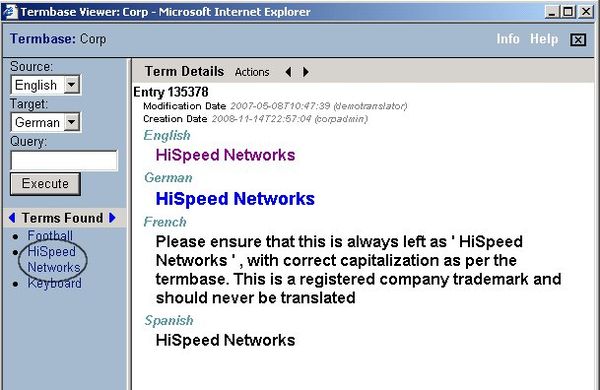
- Click any of the Terms Found to see the data imported
Enabling Access Control
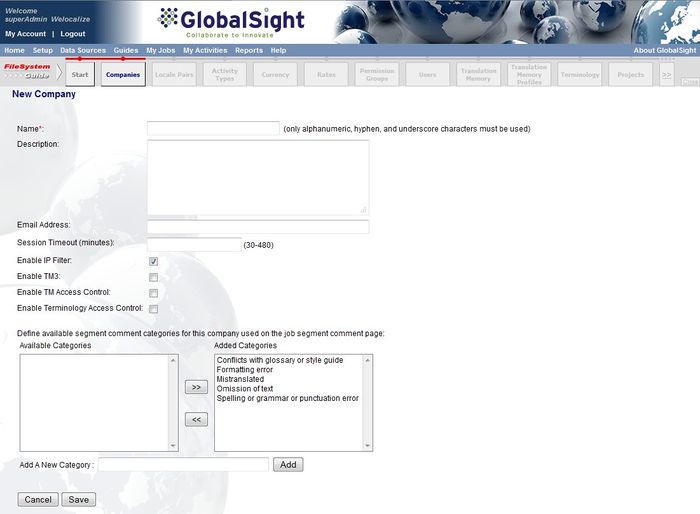
You can enable access control for TMs when creating companies by checking Enable Terminology Access Control.
Once enabled for a company, the access control enabled applies to all termbases in that company.
Restricting access to a termbase affects:
- The Terminology page
- The termbases that are available when creating or editing a project
- The termbases that are available in Search Terms

