Difference between revisions of "Dispatching Jobs"
Globalwiki (talk | contribs) m (1 revision) |
|
(No difference)
| |
Latest revision as of 03:39, 14 October 2014
| Project Management Wiki | |||||||
| Jump to: Home | Main User Guide | |||||||
 | |||||||
| General About GlobalSight My Jobs | My Activities My Account | |||||||
| |||||||
| |||||||
| |||||||
| Support Support | FAQs | Training System Requirements Logging in |
| Related Information: |
You can dispatch the workflows for the job once you are ready to proceed with the work.
The activities are sent to the defined resources who can then accept them and begin the project work.
Dispatching can also be done automatically.
Dispatching a job involves:
- Checking the job for comments and requirements
- Adding comments for resources
- Confirming the workflow details
- Dispatching the workflows
Checking the job for comments and requirements
To check for comments and requirements:
- Open GlobalSight
- Enter your Project Manager user name and password and then click Login
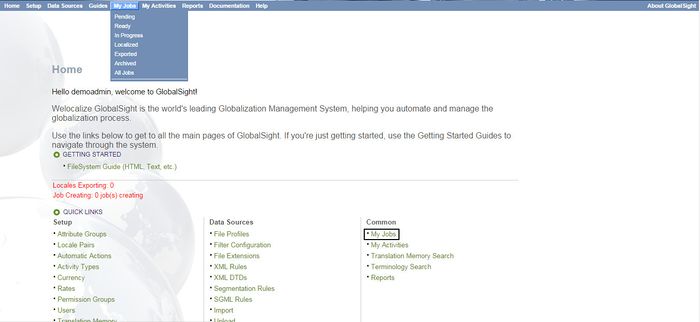
- Click My Jobs in the top menu or under Common
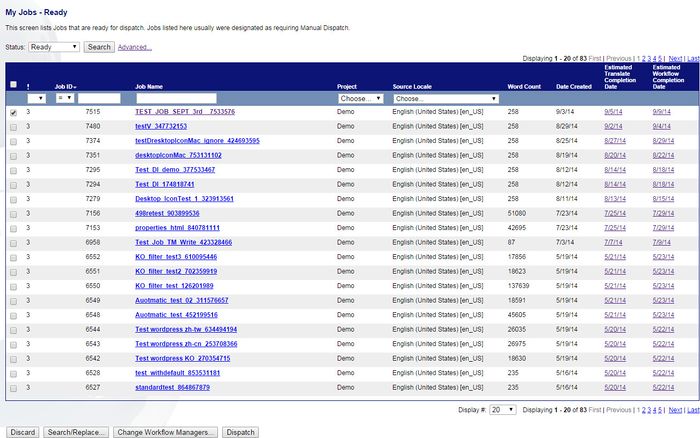
- Set the Status to Ready or In Progress and click Search. Jobs with import errors show in Pending status. You can narrow down the search by entering a Job Name or a Job ID
- Click the Job Name
- Check the general parameters of the job
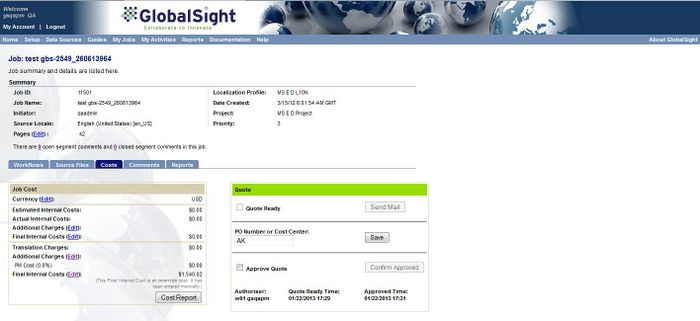
- Click Costs and confirm that the red bar has changed to green. Green means that the client has approved the quote. You do not need to do this for pre-approved quotes
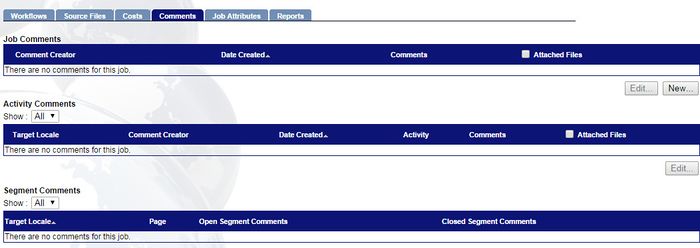
- Click Comments and check for any requirements, comments or reference files
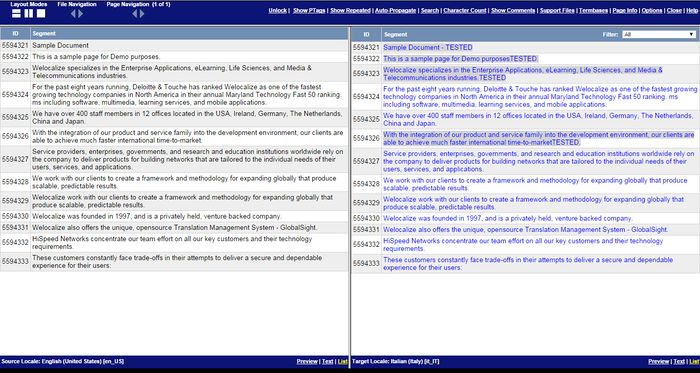
- Click Source Files and click each of the Primary Source Files to check them in the editor. No action is needed if you did this already during quoting. Make sure to check:
- Segmentation
- Matches (to the TM and the Term Base)
- Content not for translation
- Content not extracted (Text View)
Adding comments for resources
To add comments for the resources:
- Select the target locale to comment on in Pop-up Editor
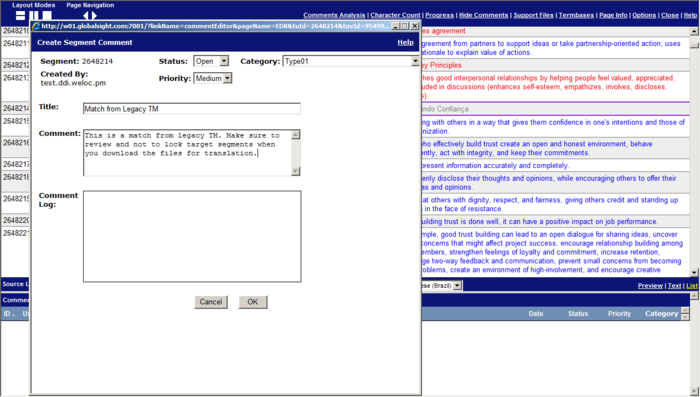
- Add context-specific comments:
- Open the file in the editor and click the segment
- Add the segment comment and click OK
- You can apply a comment to all locales by checking Share with Other Locales.
Comments are visible to translators and reviewers. Restricted attachments are visible only to clients.
Confirming the workflow details
To confirm the workflow details:
- Click Workflows
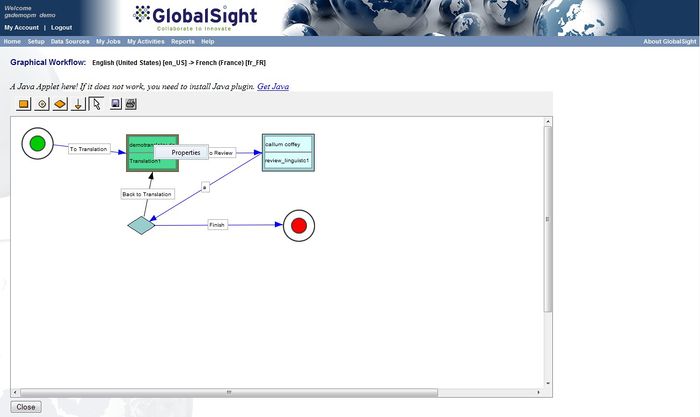
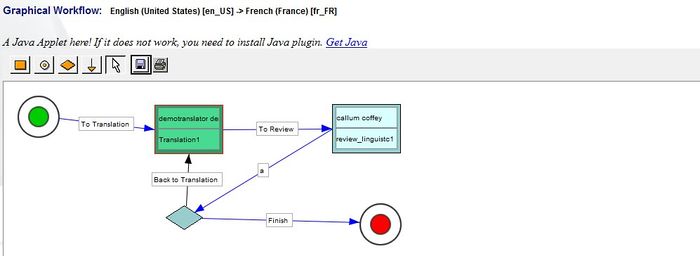
- Select each workflow and click Edit to check the workflow details
- The workflow has preset tasks, resource assignments, time parameters and so on
- Contact the GlobalSight Team to customize the workflow further for the job
- Right-click each box and select Properties using the white arrow
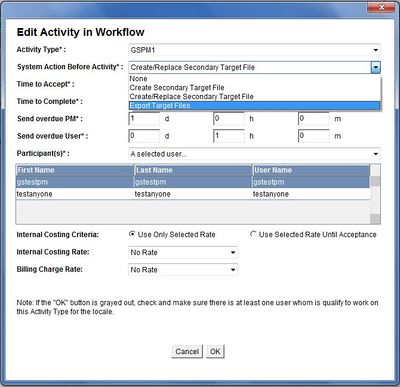
- Define whether the target files are exported automatically when the workflow activity starts, if needed. The export works in the same way as clicking Export in the Job Details page
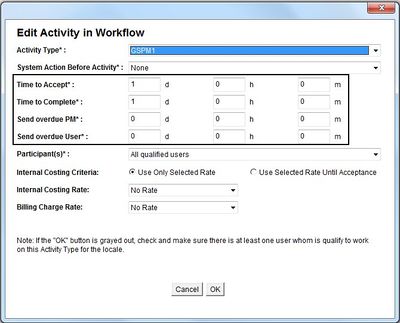
- Check that the preset time values are applicable in Edit Activity in Workflow
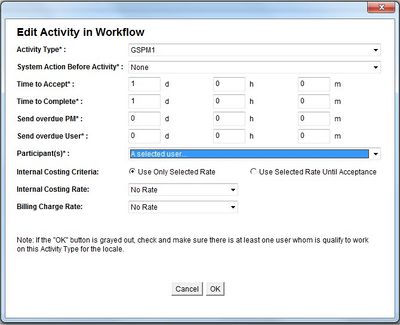
- Assign a specific resource to the task by setting the Participants to A selected user… and clicking OK
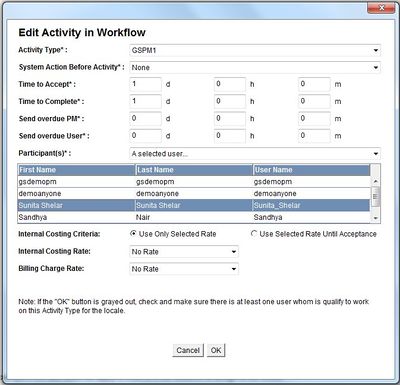
- Select the resource from the Participants list. The resource selected is highlighted in blue. Press Ctrl to select several
- You can avoid assigning the task to the wrong resource by assigning it to welocvzb.proxy, xxx.weloc.trans, xxx.reviewer or xxx.editor. For example if the task does not apply to a job or if you do not know the resource
- The Project Manager is notified at this stage. You can skip the task, reassign it, or complete the activity on their behalf
- Contact the GlobalSight Team if you cannot find the resource
- Click OK
- Right-click the next activity and repeat the same steps
- Click Save once you have made all changes
- Click Close to return to the main job screen
Dispatching the workflows
To dispatch the workflows:
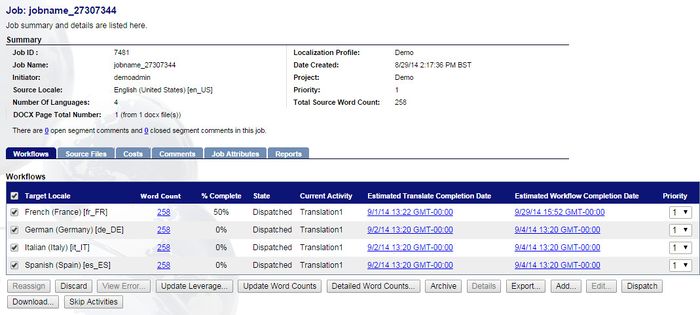
- Click Workflows
- Update the leverage and word counts, if needed, by clicking Update Leverage and Update Word Counts
- Select all of the workflows and click Dispatch
The workflow State changes to Dispatched and the Current Activity shows.
You can re-assign activities later as needed.
Activities are automatically forwarded to the resources. The resources are given one day to accept, by default.
Running a test job
Running the files through a complete test job and validating the export can be useful. For example to test new filters or if requested by the GlobalSight Team.
You may have already tested during quoting.
For workflows with a Kickoff step
- Click My Activities
- Select all of the corresponding Kickoff activities
- Choose the correct work-flow path, if needed. For example you can choose a path based on DTP requirements. The options available are:
- the job does not require DTP
- the job requires DTP
- the job requires an Extraction prior to Translation. See any implementation-specific process map as agreed
- Accept the activities and mark them as completed
