Difference between revisions of "Managing Terminology"
Globalwiki (talk | contribs) |
|
| (5 intermediate revisions by 4 users not shown) | |
(No difference)
| |
Latest revision as of 15:46, 12 January 2016
| Project Management Wiki | |||||||
| Jump to: Home | Main User Guide | |||||||
 | |||||||
| General About GlobalSight My Jobs | My Activities My Account | |||||||
| |||||||
| |||||||
| |||||||
| Support Support | FAQs | Training System Requirements Logging in |
You can view and manage the termbases (glossaries) in your project.
For example you can import and export terms, get statistics, browse and edit termbases and run maintenance.
Contents
- 1 Importing Terminology
- 2 Searching Glossaries
- 3 Getting Termbase Statistics
- 4 Indexing Termbases
- 5 Browsing Termbases
- 6 Importing New Terms into Termbases
- 7 Exporting Terms from Termbases
- 8 Creating/Duplicating/Editing Termbases
- 9 Running Termbase Maintenance
- 10 Managing Input Models
- 11 Restricting Access
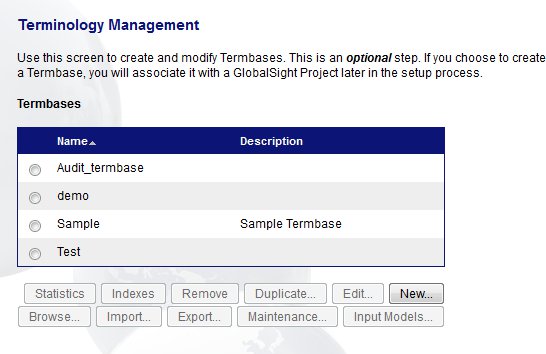
To manage glossaries (termbases) in GlobalSight, click Setup->Terminology from the top menu. You can also open it from Setup in the Quick Links. Terminology Management opens.
Select a termbase to manage it. You can:
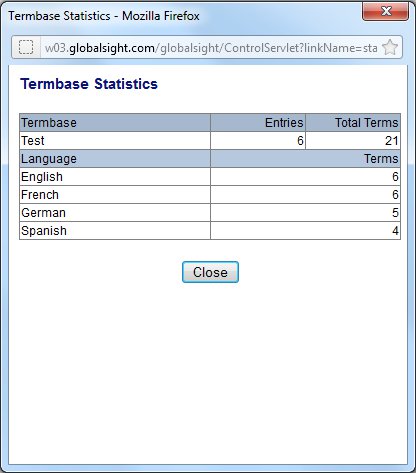
- Get termbase statistics: Show the number of entries as well as the number of terms in each language in the selected termbase
- Index a termbase for better performance and to enable termbase leveraging
- Remove the termbase selected by selecting the termbase and clicking Remove
- Browse the termbase: View terms in the selected termbase. Managers can edit the termbase entries
- Import new terms into the selected termbase
- Export terms from the selected termbase
- Create/Edit/Duplicate termbases: Create a new empty termbase/Modify an existing termbase/Make a copy of a termbase
- Run maintenance: Search and replace entries in the termbase selected
- Input Models: Define the basic structure of termbase entries
Admin users can also edit the users that can access the termbase.
Importing Terminology
You can import terminology as needed.
Searching Glossaries
You can also select the glossaries to search using the Terminology -Search Terms.
Open Terminology - Search Terms by clicking My Activities->Term Search.
Project Managers can also open it by clicking Setup->Terminology->Search Terms.
Getting Termbase Statistics
To get statistics on a termbase:
- Select the termbase
- Click Statistics
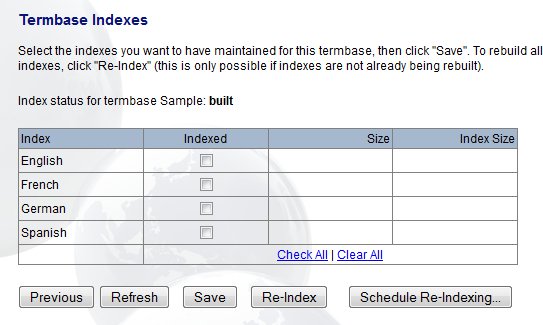
Indexing Termbases
To get statistics on a termbase:
- Select the termbase
- Click Indexes
- Select the index, for example by language or concept-level. You can upload the latest data again by clicking Refresh
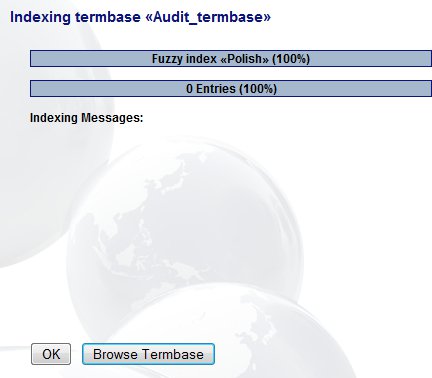
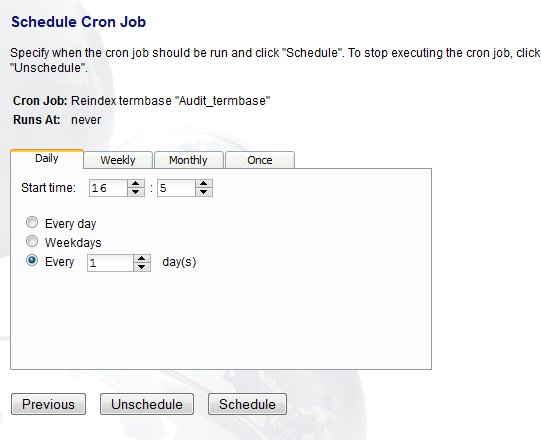
- Re-index the termbase languages and/or concepts selected. You can only re-index if indexes are not already being rebuilt. Click Re-Index or Schedule Re-Indexing to set a time for when the re-indexing happens
- Click OK to return to Terminology Management or Browse Termbase to check the contents
Browsing Termbases
To browse a termbase:
- Select the termbase
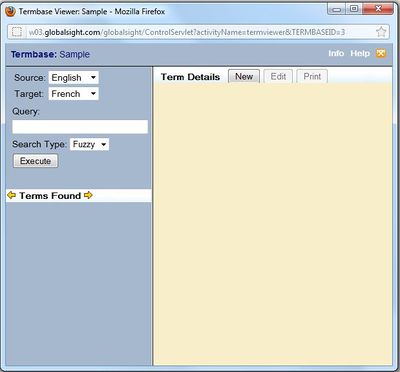
- Click Browse
You can enter queries and search for either fuzzy or exact matches.
You can manually add new terms to the termbase by clicking New, rather than re-uploading the entire glossary.
Importing New Terms into Termbases
To import new terms into a termbase:
- Select the termbase
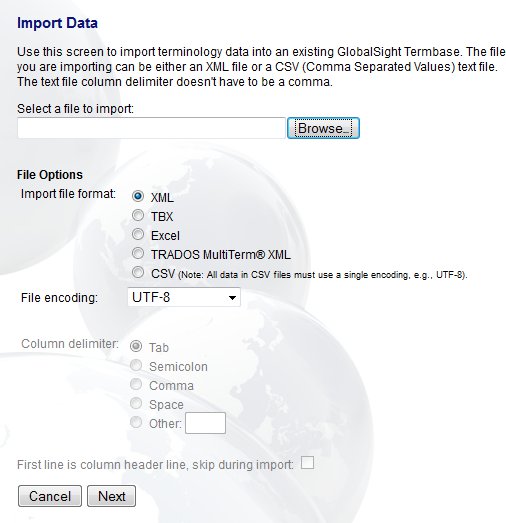
- Click Import
- Click Browse and select the file
- Select the Import file format under File Options:
- XML: The XML file must follow a specific termbase XML DTD
- TBX
- Excel
- TRADOS MultiTerm® XML
- CSV: Any delimited text file. All data must use the same encoding. For example UTF-8. For CSV files, select the Column delimiter also
- Click First line is column header line, skip during import if the first line of the delimited text file is a header
- Click Next
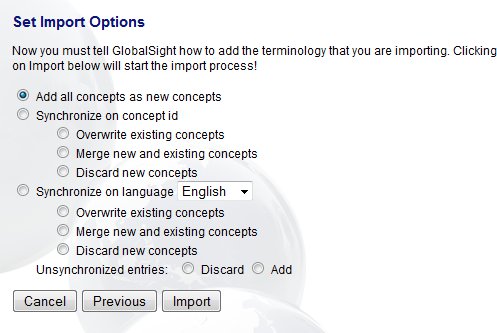
- Set the import options:
- Add all concepts as new concepts: All concepts in the file are added to the termbase
- Synchronize on concept id:
- Overwrite existing concepts: When two concepts have the same id, the new concept overwrites the current one. Extra language term data in the system remains
- Merge new and existing concepts: When two concepts have the same id, the new concept merges with the current one
- Discard new concepts: When two concepts have the same id, the new concept is discarded
- Synchronize on language: Select the language on which concepts should be synchronized
- Overwrite existing concepts: When two concepts have the same term in the selected language, the new concept overwrites the current one. Extra language term data in the system remains
- Merge new and existing concepts: When two concepts have the same term in the selected language, the new concept merges with the current one
- Discard new concepts: When two concepts have the same term in the selected language, the new concept is discarded
- Unsynchronized entries: For concepts that do not appear in the existing termbase when synchronizing on concept id or language. When selecting Add all concepts as new, this option is ignored
- Discard: New concepts that are not in the existing termbase are discarded
- Add: New concepts that are not in the existing termbase are added to the termbase
- Click Import
Exporting Terms from Termbases
To export terms from a termbase:
- Select the termbase
- Click Export
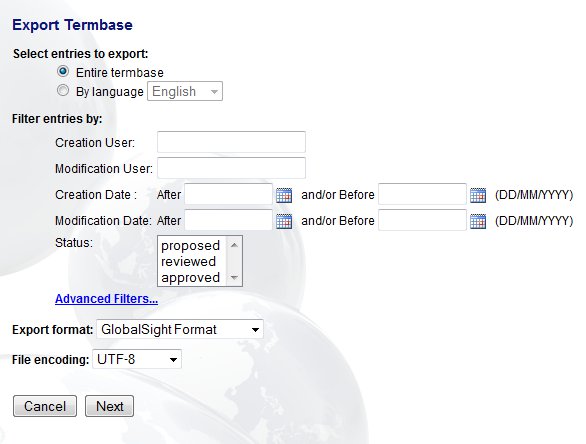
- Select the entries to export:
- Entire termbase: Export all entries in the termbase, sorted by entry id
- By language: Export entries with terms in that language only, sorted by the language order
- Select the options to Filter entries by
- Select the Export Format:
- GlobalSight Format: Export an XML file
- HTML: Export a HTML file with Termbase entries, also suitable for printing
- TBX
- TRADOS MultiTerm® iX: Export a Trados-compatible XML file
- Set the File Encoding to UTF-8, the default setting
- Click Next
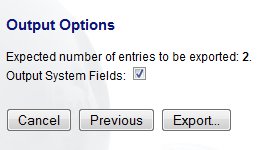
- Select the Output Options. Click Output System Fields to write system fields to the termbase being exported
- Click Export
- Click Download Export File to save the file to your computer or click OK to return to Terminology Management
Creating/Duplicating/Editing Termbases
To create/duplicate/edit a termbase:
- Select the termbase
- Click New/Duplicate/Edit
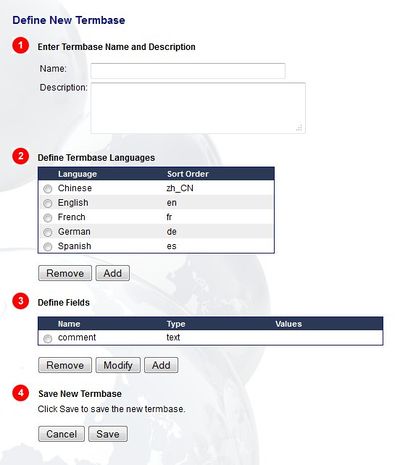
- Enter the Termbase Name and an optional Description. The name cannot contain hyphens (-) or the percentage symbol (%)
- Select the languages to Define as Termbase Languages. You can also Add and Remove those already on the list
- Select the fields to show in the termbase. You can also Add and Modify those already on the list
- Click Save
Running Termbase Maintenance
To run termbase maintenance:
- Select the termbase
- Click Maintenance
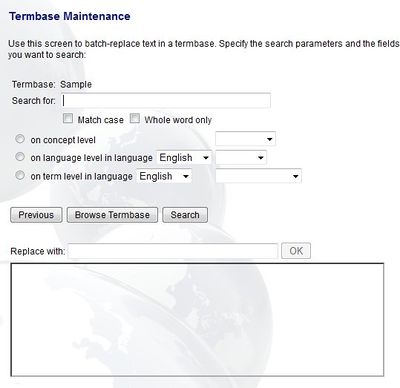
- Enter the text to Search For:
- Match case: Click to make the search case-sensitive
- Whole word only: Click for an exact search or unclick for a fuzzy search
- On the concept level: Confine the search to fields at the concept-level - Definition, Domain, Note, Project, Source. Leave blank to search all concept types
- On language level in language: Confine the search to fields in the language - Source, Note. Select a language in which to perform the search. Leave blank to search all language level types
- On term level in language: Confine the search to fields at the term-level - Definition, Context, Example, Source, Note. Select a language in which to perform the search. Leave blank to search all term level types
- Click Search
Managing Input Models
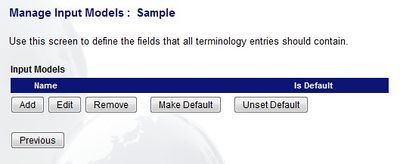
To manage input models:
- Select the termbase
- Click Input Models...
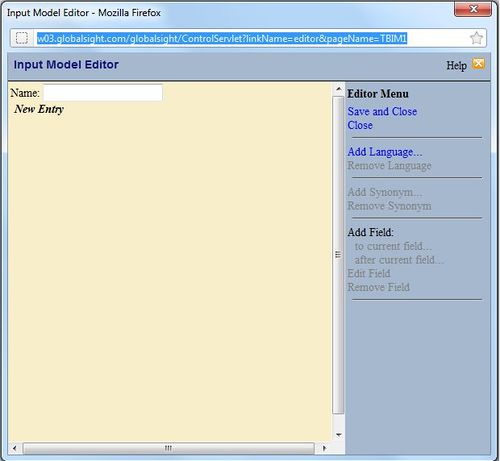
- Click Add/Edit to add/edit input models using the Input Model Editor
- Enter a name for the input model
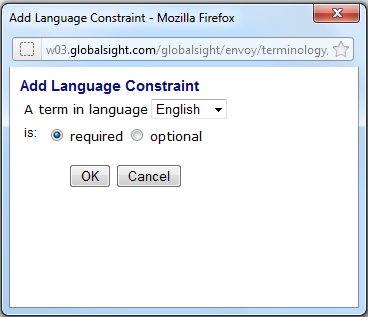
- Click Add Language... to add a language to the input model
- Select a language
- Click Required to require a term to be entered for the language selected above. Otherwise, click Optional
- Click OK to save and return to the Input Model Editor. You can also remove a language by clicking Remove Language
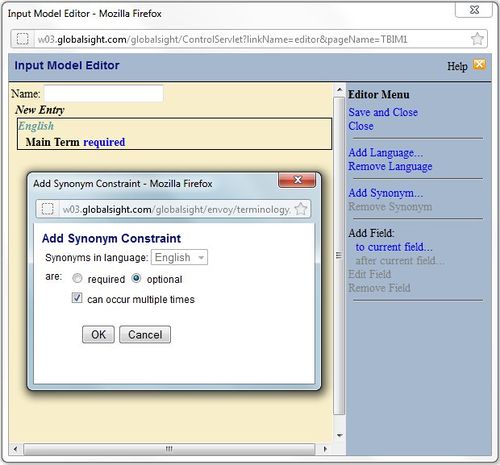
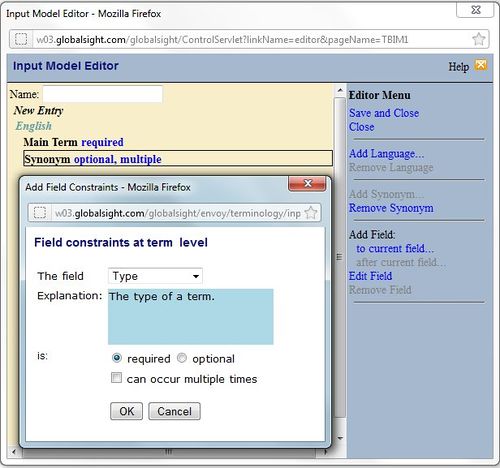
- Click Add Synonym... to add a synonym to the input model
- Select the language of the term to which the constraint is being added
- Click Required to require the field to be complete to save the termbase entry. Otherwise, click Optional
- Click can occur multiple times to have several occurrences of the term
- Click OK to save and return to the Input Model Editor. You can also remove a synonym by clicking Remove Synonym
- Click Add Field... to add field constraint to the input model
- Add Field: to current field...: add a field as a sub-field of the field currently selected
- Add Field: after current field...: add a field at the same level as the field currently selected
- Select a field Type to constrain
- Enter an Explanation
- Click Required to require the field to be complete to save the termbase entry. Otherwise, click Optional
- Click can occur multiple times to allow the field to be repeated within the termbase entry
- Click OK to save and return to the Input Model Editor. You can also make changes by clicking Edit Field and remove a field by clicking Remove Field
- Click Save and Close to save the input model and close or Close to close and discard the changes
You can remove an input model by selecting it and clicking Remove. You can set whether or no to set it as the default model to use by clicking Make Default/Unset Default.
Click Previous to return to Terminology Management.
Restricting Access
Administrators can restrict access to termbases to particular users. Access is configured on a termbase basis.
Restricting access to a termbase affects:
- The Terminology page
- The termbases that are available when creating or editing a project
- The termbases that are available in Search Terms
To restrict access to a termbase:
- Open Terminology
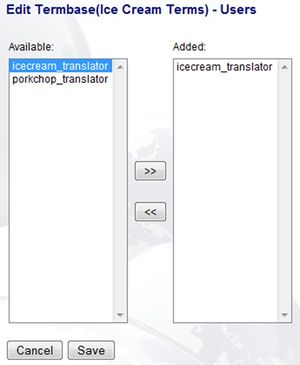
- Select a termbase and click Users
- Select the users to be given access to the termbase and click >>
- Click Save
